Did you just buy your hamster? Or maybe just receive it as a birthday gift? If so, this guide will help you quickly set up a cage for your new pet. But before explaining this, it’s important to understand that buying or adopting a pet with no prior knowledge or enclosure set up at home is a very risky idea for obvious reasons:
- If you don’t know how to actually take proper care of your pet, are not sure about certain basic things that what their food is made of (what kind of grains and seeds they eat), what fresh foods you can’t give them, if they need a wheel, proper cage dimensions and so on, you aren’t well educated enough on your hamster.
- If you do know all these things and you are experienced with this animal but you don’t have a cage set up, you are running a risk for your animal: having a nice, set up and adequate for your hamster to put in once your travels are done is not ideal, it’s one of the most basic things you can do for you pet.
- Obviously, there are exceptions, which is why I’m just going to explain the process of setting up an adequate cage, food and other necessities you must have if you don’t already have a cage set up at home.
A hamster cage includes a wheel, a water bottle, various enrichment toys, the right bedding and hay, a hamster’s minimum cage dimension depends on the hamster (Syrian, dwarf…).
The bigger your hamster is, the bigger the cage needs to be. For all hamsters, I highly recommend the Ikea DETOLF shelf that doubles horizontally as a very big cage for your hamster. There are many tutorials online that explain how to make different lids or cage tops based on what suits you.
When it comes to the wheel, your hamster would benefit greatly from a 16 cm closed wheel (the one without the wires), yes even for your dwarf hamster! Additionally, you can provide your dwarf with a saucer.

Water bottles must be changed every day and it’s important to get a good quality, dust free brand of bedding. The same goes for hay.

I personally recommend the care fresh bedding in unscented as well as a neutral colour (like white or a brown). It is very important to pay attention to how coloured beddings are made, because they could contain chemicals that aren’t healthy for your pet. Timothy hay is a very well-known type of hay and I use the Kaytee brand.
There are so many tutorials especially on YouTube that explain how to craft toys for your hamster. I recommend wooden toys and not plastic as well as paper towel tubes that you can burrow under your hamsters bedding. Add the toys in before putting your hamster in because once your hamster is in the cage, he needs to get used to it and destress. This means you can’t touch or pick your hamster up for at least a couple days! In the beginning, you don’t have to put a lot of chew toys, just enough for your hamster to get used to. Once you feel like your hamster has gotten used to his setup and is comfortable, feel free to add in as many toys as you want!
Ok, so now that you’ve gotten all the basics, time to set up your cage!
- Find a draught free area that’s slightly elevated, hamsters are sensitive animals and can catch pneumonia or colds, both deadly to them.
- Next, once you’ve found a quiet and draught free space, remove the lid and wash both the lid and cage thoroughly with a mixture of water and white vinegar.
- Now you can add in your bedding. *To start, add a first layer of bedding (about an inch) and add you can add any tunnels or treats, next add your second layer, it must completely cover the tunnels, then I like to add a thin layer of hay followed by a last layer of bedding. This should add up to five-six inches of bedding, ideal for your hamster.
- Next is the more aesthetic aspect of getting your cage together. Add your wheel(s), chews, water bottle, food bowl and multiple hiding places for your hamster. I also like to include a mineral block and more hay.
Now that your cage is all ready, its time to put your hamster in its cage. You should that the box or travel carrier it came in along with any bedding it came with and leave it in its cage. The next day, I like to remove the carrier if it’s not made of cardboard.
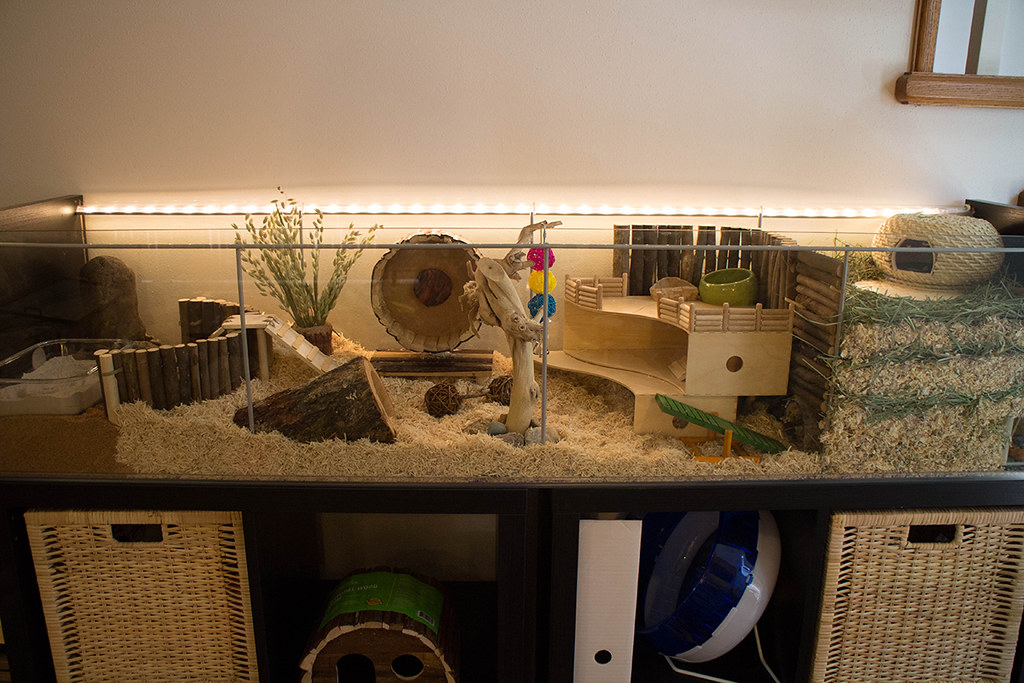
And that’s it! I hope this article was useful! Here are some great examples of adequate hamster cages:


